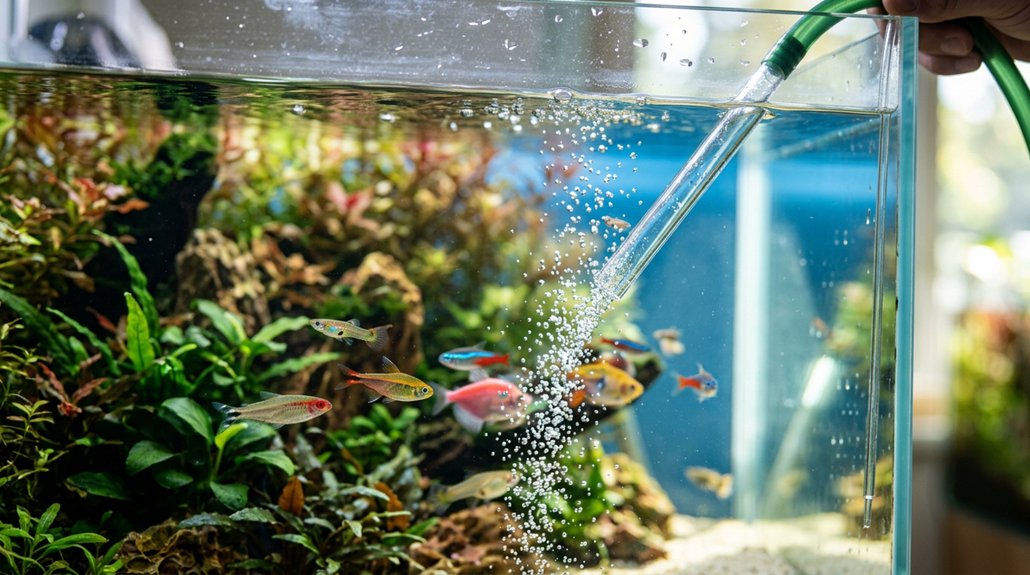
Do a partial water change once a week, removing about 10–20% of the tank water, or up to 30–50% in heavily stocked systems. Turn off filters, heaters, and CO2, then siphon into a marked bucket while vacuuming gravel near the substrate. Test and dechlorinate replacement water, match its temperature within 1–2°C, and refill slowly. Restart equipment, then watch fish for stress and retest water after 24–48 hours for finer control.
Key Takeaways
- Do a partial water change once a week, usually replacing 15–20% for lightly stocked tanks or 30–50% for heavily stocked ones.
- Turn off filters, heaters, CO2, and air pumps, then remove water with a siphon or gravel vacuum into a marked bucket.
- Match new water temperature within 1–2°C and treat it with dechlorinator before adding it back slowly.
- Vacuum about 10–20% of the substrate, focusing on dirty areas while avoiding roots, fry, shrimp, and small fish.
- Restart equipment after refilling, then check temperature, water clarity, and fish behavior for stress.
How Often to Change Aquarium Water
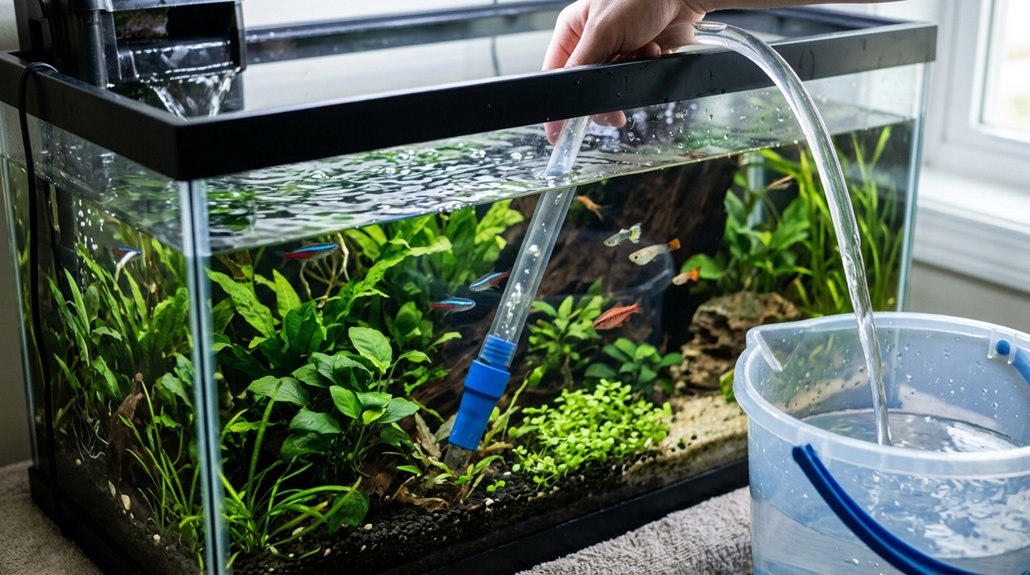
As a general rule, you should perform partial water changes once a week, with the amount based on your tank’s bioload: 15–20% weekly for lightly stocked or smaller aquariums, and 30–50% weekly for heavily stocked tanks or larger setups. Build this into your maintenance schedule and keep it consistent. During the first month of a new aquarium, increase changes to 2–3 times per week while the system cycles, because ammonia and nitrite can spike. Never replace more than about 50% at once; if remediation is needed, split it into smaller sessions. Between scheduled changes, top up evaporation to preserve stable parameters. If tests show rising ammonia or nitrate, increase frequency or volume. Make seasonal adjustments only when evaporation or temperature shifts affect water stability.
Water Change Tools You Need
Before you start a water change, gather the right tools: a marked 5-gallon bucket for measuring and transporting water, a siphon or gravel vacuum for removing water and detritus, a reliable liquid dechlorinator for treating new water, a liquid test kit for checking ammonia, nitrite, nitrate, pH, GH, and KH, and a thermometer or heater to match replacement-water temperature.
Before you start a water change, gather the right tools for accurate, safe, and consistent maintenance.
- Calibrate your bucket so its markings match real volume.
- Run the siphon with the vacuum head near substrate.
- Dose dechlorinator into prepared water before refilling.
- Verify temperature and basic chemistry to protect microbial balance.
These tools let you remove waste accurately, avoid stirring up livestock, and return conditioned water at a stable temperature. Use them consistently, and you’ll keep each change controlled, repeatable, and safe for fish and shrimp.
Test Your Tap Water First
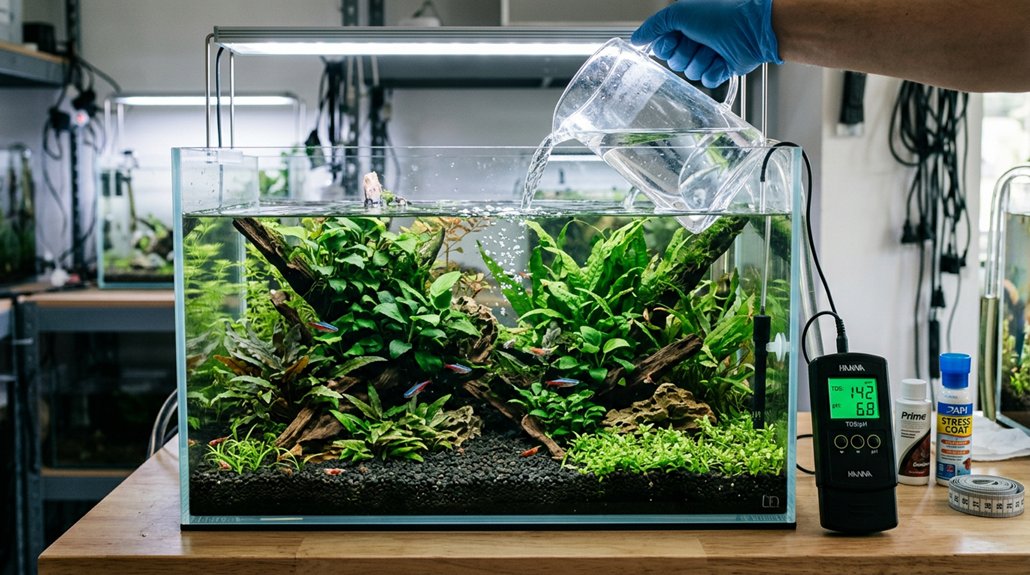
Before you use tap water for a change, test it to establish a baseline for pH, GH, KH, ammonia, nitrite, and nitrate. You’ll use these values to predict how the refill’ll affect your aquarium’s chemistry and whether your livestock’s needs are being met. Pay close attention to pH and hardness, since low KH can destabilize pH and GH/KH must stay within suitable ranges for your fish.
Tap Water Baseline
Test your tap water first so you know exactly what you’re adding to the aquarium. Because seasonal variability and municipal treatment can change supply chemistry, measure pH, GH, KH, ammonia, nitrite, and nitrate before every water change. Record your usual temperature, pH, GH, KH, and nitrate so you can match replacement water and avoid shock.
- Fill a clean container with tap water.
- Test for chlorine, chloramine, and heavy metals.
- Use dechlorinator, a metal chelator, or RO/DI if needed.
- Compare GH and KH to your tank’s targets.
Low KH can drive pH instability, and GH/KH mismatches can stress fish and plants. If your tap is extremely hard or contaminated, use treated water or RO/DI, then remineralize to the needed GH/KH before adding it.
Check pH And Hardness
Check your tap water’s pH, GH, and KH before every water change so you know whether it will raise or lower the tank’s chemistry. Use a liquid kit or GH/KH strips, then compare the results with your aquarium’s values. If pH or carbonate hardness differs much, your fish, shrimp, and biofilter can be stressed. For hard water, or when metals are present, use RO/DI water or blend it with tap water to reach the target GH/KH. Record readings weekly, and retest when your water supplier changes treatment. After dechlorination and temperature matching, let the replacement water sit, then check again. This confirms buffer stability and tells you whether mineral supplementation is needed before you add it.
Match the Temperature and Dechlorinate
Match the temperature of your replacement water to the aquarium water as closely as possible, aiming for within about 1–2°C (≈2–4°F) to prevent thermal shock. Measure both with a reliable thermometer, then adjust the bucket by heating or cooling until temperature equilibration occurs. If the difference is small, let the bucket sit in the same room or place the heater in it for 30–60 minutes.
- A thermometer reading beside the tank.
- A bucket warming beside the heater.
- Water settling into match the tank.
- Dechlorinator dosing before the pour.
After temperature matching, follow correct dechlorination timing: dose the bucket per the label, mix thoroughly, and never add untreated tap water. Recheck temperature, then add the conditioned water slowly and watch fish for stress.
Clean the Glass and Trim Plants
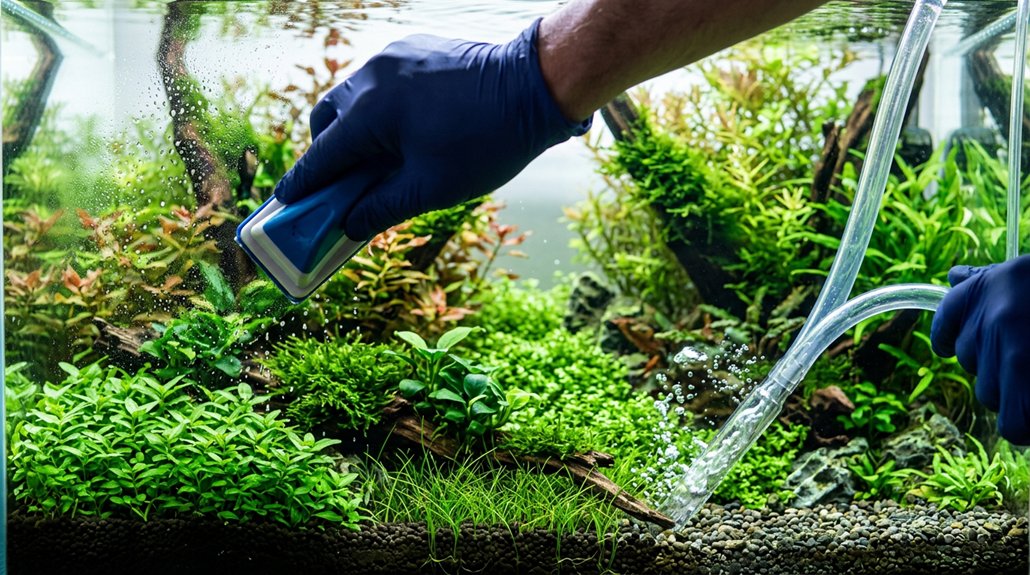
Once the replacement water is dechlorinated and at the right temperature, clean the inside glass before you siphon. Use an aquarium-safe scraper or pad to remove algae and biofilm; doing this now supports algae prevention and keeps loosened debris from circulating later.
| Task | Tool | Purpose |
|---|---|---|
| Scrape glass | Safe pad | Remove film |
| Trim leaves | Aquascaping scissors | Improve light |
| Collect debris | Net | Prevent clogging |
Next, trim dead, decaying, or overgrown leaves with sharp scissors. In heavily planted tanks, prune stems and roots selectively, preserving healthy growth points and limiting cuts to 20–30% of biomass. Remove clippings with a net before vacuuming substrate. Inspect plants for pests or disease, and discard affected material outside the tank. This keeps nutrients from reentering the water and can aid plant propagation.
Siphon Out 10–20% of the Water
Siphon out about 10–20% of the tank volume each water change; 15–20% weekly is common, while 10–15% suits smaller or lightly stocked tanks. Use a gravel vacuum with the head held close to the substrate so you remove detritus without pulling up fish or plants. Turn off exposed equipment first, work methodically, and refill with dechlorinated water matched to the tank temperature.
Siphon Percent Guidelines
For routine maintenance on a low- to moderate-stock freshwater tank, remove about 10–20% of the water per change to clear dissolved wastes while keeping beneficial bacteria and overall stability intact. Use these recommended percentages as your baseline, then make seasonal adjustments if evaporation, feeding, or stocking changes shift your bioload.
- A marked 5-gallon bucket showing the exact volume.
- A calm tank line dropping slightly below the trim.
- Fish staying steady while the water level lowers.
- Fresh replacement water poured back to the original mark.
In small or heavily planted tanks, 10–15% weekly is often enough. Larger tanks with more livestock may need about 20% weekly. New aquariums do better with 2–3 smaller siphons each week for the first month. Avoid removing more than 50% at once unless it’s an emergency, since sudden shifts can stress fish and chemistry.
Gravel Vacuum Method
Unplug the filter, heater, and CO2 system before you start, then use a siphon gravel vacuum to pull out 10–20% of the tank water while keeping the vacuum head close to the substrate so you lift detritus without trapping small livestock. Move methodically across the gravel, briefly angling the tube to break up waste, then easing off so the substrate settles and the substrate microbiome stays stable. Measure removed water in a marked bucket so you can replace the same volume. If the noisy siphon slows, clear debris and continue in short passes rather than churning one area. Keep the vacuuming controlled, targeting visible mulm and uneaten food only. This limits disturbance, preserves beneficial bacteria, and leaves the bed ready for the refill step that follows.
Safe Water Removal
With the equipment switched off, remove 10–20% of the aquarium water using a siphon or gravel vacuum, keeping the vacuum head close to the substrate so you lift detritus and uneaten food without disturbing plant roots or drawing in small fish or shrimp. Use siphon safety by watching the hose continuously and stopping if livestock drifts toward it.
- Set a clean, marked bucket beside the tank.
- Track the removed volume accurately.
- Pause for fish evacuation if tiny inhabitants approach the intake.
- Cover the hose with fine mesh or your hand as a barrier.
For small, lightly stocked tanks, aim for 10–15%; larger systems can handle up to 20%. Dispose of the water promptly or use it for plants, then prepare treated replacement water before refilling slowly to match temperature and chemistry.
Vacuum the Gravel Without Stirring Waste
Lower the gravel vacuum head until it’s just touching the substrate, then lift it slightly to create suction that pulls debris up while allowing heavier gravel to drop back down. Keep the intake angled about 20–30° and work in small sections so you remove trapped detritus without stirring the bed. In planted tanks, use a smaller siphon or gentle hand-pump and skim the surface layer to protect roots. Focus on 25–50% of the substrate each water change, especially the dirtiest areas, and match this with partial water removal to limit disruption. Pause when the outflow clouds, let particles settle, then continue. Done correctly, you’ll preserve surface agitation, maintain microbial balance, and prevent waste from re-entering the water column.
Refill the Tank Slowly and Safely
Once the old water is out, refill the tank slowly by using a siphon or a very gentle pour that returns water at about 1–2 liters per minute, which helps prevent substrate disturbance and keeps debris from lifting back into the column. Match the replacement water to the aquarium within 1–2°C, and dechlorinate it exactly as directed. If you use conditioners, add them before refilling. Aim the stream at a hard surface or through airline tubing to soften impact and protect plants and livestock. Keep the flow low at slow pourpoints, then maintain slight surface agitation to avoid splashing.
- A thin water ribbon on glass
- A calm sand bed undisturbed
- Leaves swaying, not bending
- Tiny ripples spreading evenly
Restart Equipment and Check Parameters
When the tank is full and the water level is correct, reconnect and power on the filter, heater, CO2 system, and air pump so circulation and temperature control resume immediately. Check the temperature at once; the refill should match the tank within 1–2°C (2–3°F) to prevent thermal shock. If you used dechlorinator or plant protectors, confirm they were dosed as directed and note any ongoing dosing schedule before restoring automated CO2 or fertilization. Watch your livestock for 30–60 minutes, looking for normal activity, breathing, and schooling. If you see gasping, lethargy, or loss of appetite, use your Emergency procedures and recheck water quality. Within 24–48 hours, test ammonia, nitrite, nitrate, pH, and GH/KH if relevant. Equipment calibration helps keep readings dependable.
Protect Plants, Fish, and Shrimp
You should match the new water temperature to the aquarium within about 1–2°C (2–4°F) before refilling to avoid thermal shock to fish and dwarf shrimp. When you siphon, trim dead or decaying plant material carefully and keep the gravel vacuum clear of roots, fry, and small shrimp. Add the replacement water slowly and shield fish and shrimp from sudden flow or disturbance so they aren’t stressed.
Match Water Temperature
Match the replacement water temperature to the aquarium within about 1–2°C (2–4°F) before adding it, especially for sensitive fish and dwarf shrimp. Use temperature equalization and gradual acclimation so you don’t trigger stress responses. Measure the tank with a reliable thermometer, then adjust the prepared water until the readings match.
- A bucket resting in the same room, slowly warming or cooling.
- A heater standing in the bucket, stabilizing the water column.
- A thermometer confirming identical readings before transfer.
- A steady siphon or drip entering the tank without a cold surge.
If you’re refilling in stages, add water slowly to limit local temperature swings. For narrow-tolerance species, recheck temperature after refilling, then wait a few minutes before restarting heaters or other equipment so conditions stay stable.
Trim Plants Carefully
Trim only dead or decaying leaves and any overly long growth, and remove the trimmings from the tank with a net before siphoning so they don’t break down and spike ammonia. Use sharp plant scissors and make clean cuts at stems or nodes to limit stress. For submerged plants, trim just above the substrate, then vacuum the exposed area lightly to lift detritus without disturbing roots. Schedule heavier pruning just before a water change, or right after siphoning, so you can clear debris and refill with matched water fast.
| Task | Method | Result |
|---|---|---|
| Pruning frequency | Light, regular | Stable growth |
| Cut type | Clean node cuts | Less disease entry |
| Aquascape maintenance | Gentle vacuuming | Cleaner substrate |
Trim slowly around sensitive shrimp and small fish, then check parameters and behavior afterward.
Shield Fish And Shrimp
Before siphoning, turn off and unplug filters, heaters, and any in-tank equipment, then protect small fish and shrimp from accidental suction by using a fine-mesh net or siphon guard and keeping the vacuum head close to the substrate edge. If tiny shrimp or slow movers are exposed, place them in a mesh breeder box or cup.
- Gentle hose at the gravel line.
- Shrimp hovering in a clear cup.
- Slow detritus lift, not a deep dig.
- Calm fish, intact fins, steady breathing.
Preheat replacement water to match the tank within 1–2°C, then dechlorinate it with a product that detoxifies heavy metals. Add any plant protector after old water’s removed, before refilling. Refill slowly, restart equipment, and observe stress indicators for 24–48 hours; quarantine protocols apply if any fish show persistent distress.
Frequently Asked Questions
How Do I Change the Water in My Fish Tank Without Killing the Fish?
You’ll do a partial water change, not a full one: match temperature and chemistry, dechlorinate new water, siphon 10–30%, refill slowly for gradual acclimation, then restart equipment and watch fish for stress.
How Often Should You Do a Water Change in a Freshwater Tank?
You should change water weekly: 15–20% for lightly stocked tanks, 30–50% for heavy loads. In the first month, do 2–3 partial changes weekly. Make seasonal adjustments if ammonia or nitrate rise.
Conclusion
When you finish a water change, your aquarium should look renewed, like clear rain settling over a still pond. By following each step carefully, you’ll protect your fish, plants, and shrimp from sudden stress. Keep testing your water, monitor temperature and equipment, and stay consistent with your maintenance schedule. With steady hands and good habits, you’ll create a stable, healthy environment where your aquatic life can thrive and your tank can remain clean and balanced.