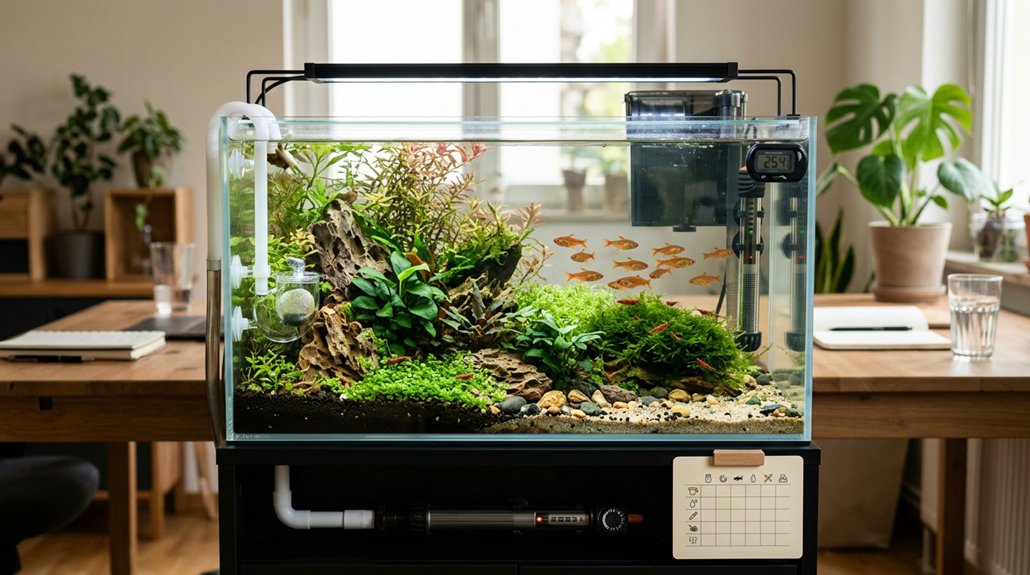
Start with a tank, stand, lid, LED light on a timer, adjustable heater, and thermometer. Choose a filter that turns the water over 3–5 times per hour, plus replacement media and spare parts. Add rinsed substrate, safe decor, and live or plastic plants. Keep a test kit, dechlorinator, conditioner, siphon, bucket, algae scraper, and net handy. Run the filter, cycle the tank, and test ammonia, nitrite, and nitrate until they stay at zero, so you’re set for what comes next.
Key Takeaways
- Choose an appropriately sized tank with a sturdy, waterproof stand and a safe location away from direct sun and drafts.
- Install a reliable filter, adjustable heater, thermometer, and LED light on a timer for stable water conditions.
- Add aquarium-safe substrate, simple décor, and live or plastic plants to provide shelter and swimming space.
- Use dechlorinator, bacteria starter, and water test kits to start and monitor the nitrogen cycle.
- Keep maintenance tools, spare filter media, and a siphon bucket ready for weekly water changes and quick repairs.
Essential Aquarium Gear for New Fish Owners
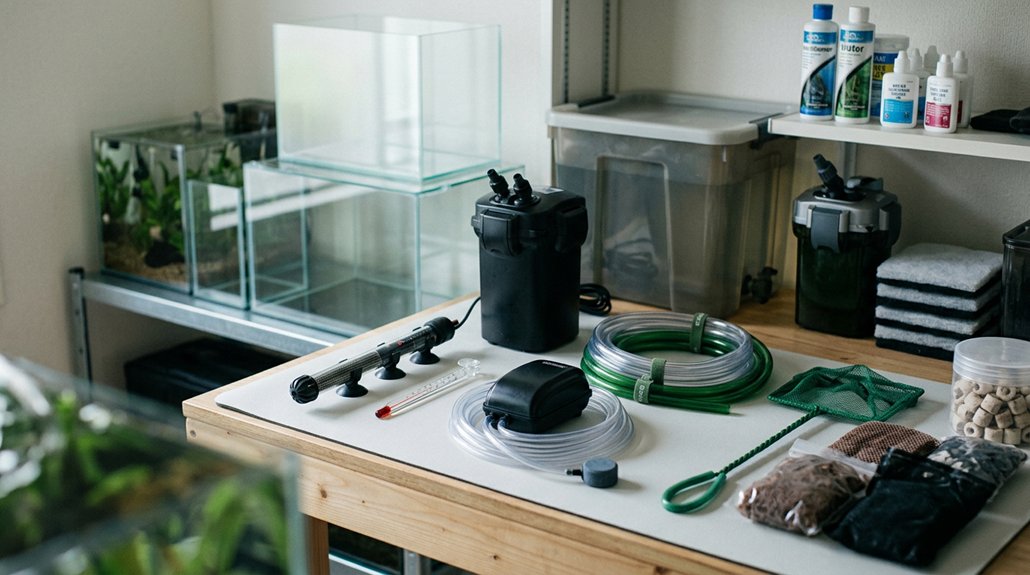
Start with the basics: a reliable filter is nonnegotiable, and it should turn over the tank’s full volume at least 3–5 times per hour—for example, about 80 GPH for a 20-gallon tank—to handle mechanical, chemical, and biological filtration. Add an adjustable heater and an in-tank thermometer, and keep most tropical fish at 74–80°F. When you fill or top off the tank, use a dechlorinator; during setup, bacteria additives can help start the nitrogen cycle. Keep ammonia, nitrite, and pH tests on hand, plus a siphon for weekly 25% water changes. A lid helps reduce evaporation and jumping, while LED lighting on a timer supports day/night cycles and better aquarium photography. Finish with a spare fishnet, algae scraper, and consistent feeding schedules to make upkeep easier.
Pick the Right Fish Tank and Stand
Once you’ve got the filter, heater, and testing gear sorted, the next big decision is the tank itself and the stand it’ll sit on. Start with a size you can manage: 10–20 gallons is beginner-friendly, while 40–55+ gallons gives you steadier water conditions.
Choose a manageable tank size first—10 to 20 gallons is beginner-friendly, while larger tanks stay more stable.
- Choose a shorter, longer tank for better swimming room and surface gas exchange.
- Set tank placement on a hard, flat, waterproof surface near power, water, and drainage, but away from sun, vents, and exterior doors.
- Pick glass for value or acrylic for lighter weight; then make sure the stand matches the full filled weight and offers full-bottom support.
For rim support, rimmed glass tanks must rest on all four corners, and acrylic tanks shouldn’t sit on soft mats that let edges sink.
Choose a Lid, Light, and Heater
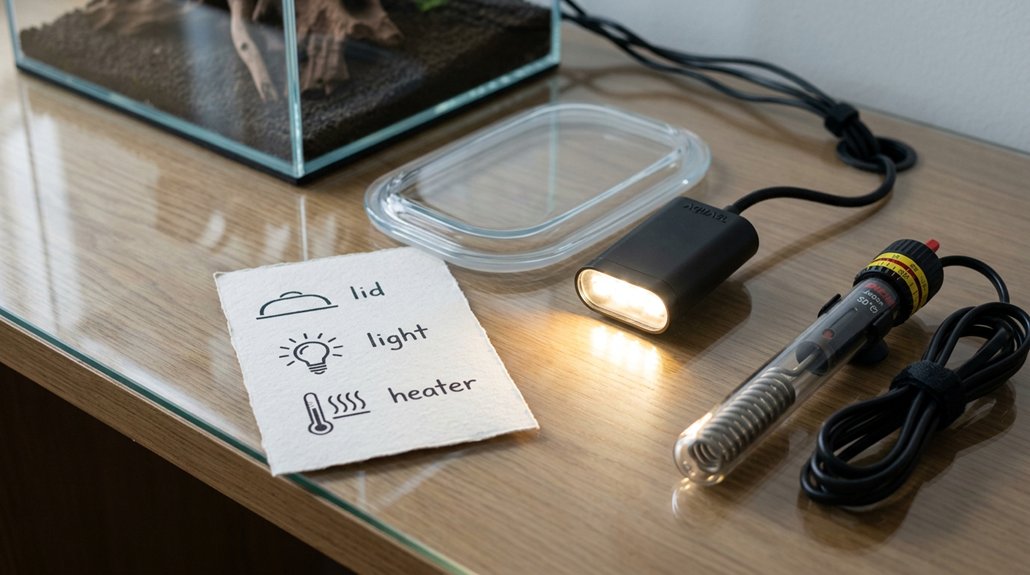
Next, top off your setup with a secure lid, proper lighting, and a reliable heater. Choose glass lids or acrylic to cut evaporation and keep jumpers in; glass lids are inexpensive, fit tightly, and can be custom cut for tubing. If you’re growing plants, pick an LED light with a timer sized to your tank, aiming for 2–5 watts per gallon; for fish-only tanks, 1–2 W/gal is enough. Place it for even coverage. Add an adjustable submersible heater at about 3–5 watts per gallon, or closer to 5 if the room’s cool. For tanks over 40 gallons, use heater redundancy with two smaller heaters. Mount a thermometer near the heater, then wait 30 minutes before powering up. Recheck for leaks and temperature after 24 hours.
Find the Best Filter for Your Aquarium
You’ll want a filter that turns over your tank’s water at least 3–5 times per hour, so a 20-gallon aquarium needs about 60–100 GPH, and you should match the flow to your fish so it doesn’t create too much current. For most beginners, a hang-on-back filter with mechanical, chemical, and biological media, or a simple sponge filter, is the easiest to maintain and works well for cycling. If you’ve got a larger tank, use a canister filter for more flow and media capacity, and choose a model with replaceable media and easy access so you can rinse it in tank water during water changes without harming beneficial bacteria.
Filter Types And Flow
A good filter should keep your aquarium water moving and clean, but it shouldn’t overwhelm your fish. Aim for a model that turns the tank over 3–5 times per hour; check flow meters and match the rating to your bio load.
- Sponge filters: choose these for small tanks, fry, or shrimp when you want gentle flow and strong biological filtration.
- Hang-on-back filters: pick one with bio-media or a bio-wheel for a balanced mix of mechanical, chemical, and biological filtration in community tanks.
- Canister filters: use these for tanks over 40 gallons or heavy stocking when you need high flow and lots of media space.
If your fish prefer low current, baffle the outlet or reduce flow so they stay calm and active.
Maintenance And Reliability
To keep your aquarium stable long term, choose a filter that can turn the tank volume over at least 3–5 times per hour—for example, a 20-gallon tank should run about 60–100 GPH—and favor models that are easy to maintain without stripping away beneficial bacteria. For beginners, sponge filters or hang-on-back units with a bio-wheel are reliable, gentle, and simple to clean. If your tank is over 40 gallons, use two heaters and consider a canister filter or multiple filtration points for better flow, redundancy, and backup systems. Pick filters with replaceable, cleanable mechanical and biological media, and skip heavy chemical media unless you’re correcting a specific issue. Do weekly checks, rinse media in dechlorinated tank water, clear the intake, inspect the impeller, and use media rotation so bacteria stay established.
Add Substrate, Plants, and Safe Decor
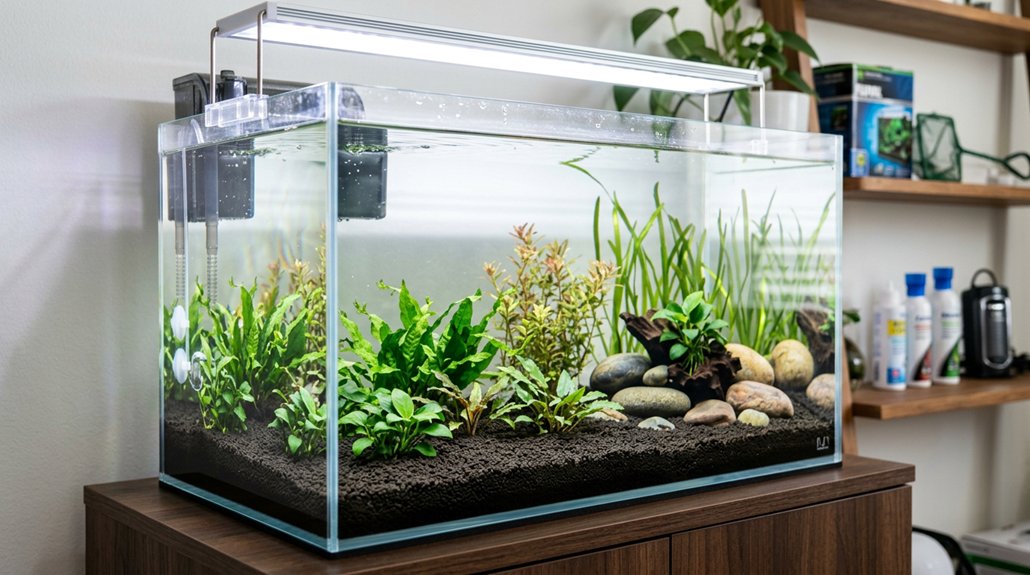
Once the tank is in place, add your substrate, plants, and decor carefully so you don’t cloud the water or injure fish later. Rinse aquarium safe gravel or sand until the water runs clear, then add about 1 lb per gallon for a 1″ bed or 2 lbs for a 2″ bed. For planted tanks, aim for 1–2 inches of substrate, deeper for root feeders. During the first partial fill, set roots into the substrate so leaves stay supported. For live plant selection, choose hardy species and use LED lighting on a timer. 1. Clean driftwood and rocks without soap. 2. Pick smooth, nonreactive decor. 3. Add caves or openings for shelter. If you can’t support plants well, use plastic plants instead.
Test and Treat Your Aquarium Water
After the substrate, plants, and decor are in place, the next step is making sure the water is safe for fish. Use test kits or reliable strips to check ammonia, nitrite, and pH every day while the tank cycles, then weekly once it’s established. You need ammonia and nitrite at 0 ppm, with pH stable for your species. Before adding tap water, always treat it with water conditioners that neutralize chlorine and chloramine and bind heavy metals. If ammonia or nitrite shows above 0 ppm, don’t add fish; keep cycling or do a 25% water change and retest. Starter bacteria can help seed filtration, but they won’t replace testing. Keep nitrate below 20–40 ppm with regular water changes.
Gather Tools for Aquarium Cleaning
To keep your tank clean, you’ll want a siphon or gravel vacuum sized for your aquarium, plus a dedicated, soap-free bucket for weekly 25% water changes and treated tap water. Add an algae scraper or magnetic cleaner, spare nets, a soft-bristled brush, and a small toothbrush so you can handle glass, decor, and tight spots without stressing your fish. Keep test strips or kits nearby to check ammonia, nitrite, nitrate, and pH before and after cleaning so you can catch water-quality changes fast.
Essential Cleaning Tools
Start by gathering the cleaning tools you’ll use on a regular schedule: a gravel vacuum or aquarium siphon for weekly 25% water changes, a dedicated bucket labeled “For Aquarium Use Only” for mixing and carrying treated water, and an algae pad, scraper, or algae magnet for keeping the glass clear without putting your hands in the tank.
- Use the siphon to lift uneaten food and detritus, helping stop nitrate buildup.
- Keep a soft-bristle brush or toothbrush for décor, plus microfiber towels and protective gloves for dry, controlled cleanup.
- Store everything dry, separate from household cleaners, and rinse nets or tools in conditioner-free or dechlorinated water.
A spare medium-quality fishnet helps when you need to move fish safely, and a hose-compatible siphon makes waste removal easier.
Weekly Maintenance Supplies
For weekly maintenance, gather the basics before you begin so water changes and cleaning go smoothly: an aquarium siphon or gravel vacuum, a clearly labeled bucket marked “For Aquarium Use Only,” and tools for glass and décor such as an algae scraper, magnetic cleaner, soft brush, toothbrush, and spare fish net. Use them to remove about 25% of the water, vacuum debris, and clean surfaces safely.
| Tool | Use |
|---|---|
| Siphon | Remove water and waste |
| Bucket | Hold tank water only |
| Test kit | Check ammonia, nitrite, nitrate |
You should also keep a thermometer, adjustable heater, and replacement filter media ready, plus spare parts for quick swaps. Rinse sponges in removed tank water, not tap water, and record readings weekly in your emergency kit.
Cycle the Tank Before Adding Fish
Before you add any fish, run the filter and begin the nitrogen cycle right after setup by providing a source of ammonia, such as fish food, pure ammonia, or a bacterial starter; in many new tanks, this process takes about 1–2 weeks, and you shouldn’t stock until the tank is cycled. Use fishless cycling to avoid stress, even if slow cycling makes you impatient.
- Test ammonia, nitrite, and nitrate daily.
- Watch for ammonia and nitrite to spike, then drop to 0 ppm.
- Keep nitrate rising, and do 25% water changes only if toxins climb.
Add live plants or a sponge filter to support bacteria and stabilize the tank. When tests show 0 ppm ammonia and nitrite, quarantine fish, then add them gradually over several days so your new biofilter isn’t overwhelmed.
Frequently Asked Questions
What Do I Need as a First Time Fish Owner?
You’ll need a properly sized tank, filter, heater, thermometer, gravel, decor, food, test kits, and a water conditioner. Set up a quarantine tank too, plus siphon, bucket, net, and lid.
What All Do I Need for a New Fish Tank?
You’ll need a tank stand, filter, heater, thermometer, water conditioner, test kits, gravel, decorations, and cleaning tools. Think of the tank as a small world: set it up strong, balanced, and ready before adding fish.
What Mistakes Do Beginner Fish Owners Make?
You’ll often make mistakes like adding fish too soon, overfeeding issues, inadequate filtration, skipping dechlorinator, overcrowding, and neglecting testing. You should cycle the tank, change water weekly, and match species to tank size.
How Do I Introduce New Fish to an Aquarium?
You’d think tossing fish in is quick—surprise, it isn’t. Use a quarantine tank for 2 weeks, then the acclimation drip: float the bag, add tank water slowly, and monitor ammonia, nitrite, temperature daily.
Conclusion
With the right aquarium gear, you’re setting up more than a tank—you’re building a stable home. I once saw a new fish keeper rush in with fish before cycling the tank, and the result was a frustrating reset. Don’t make that mistake. If you choose the right tank, filter, light, heater, and cleaning tools, and you test your water first, you’ll give your fish a safer start and make maintenance much easier.