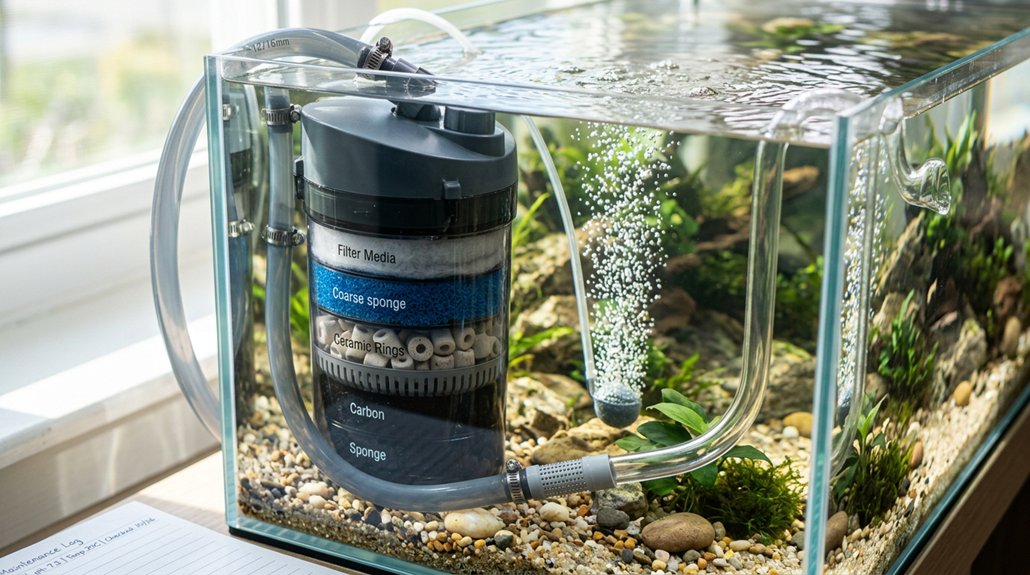
To maintain your aquarium filter properly, turn it off and unplug it before service, then rinse sponges, ceramic media, and bio-media in a bucket of tank water, not tap water. Clean intake parts, tubing, and impeller to remove debris and restore flow, and replace floss or carbon on schedule. Check flow daily and rinse pre-filters weekly. Reassemble carefully, prime if needed, and monitor water after restart for any cloudiness. More detailed steps can help you avoid problems.
Key Takeaways
- Turn off and unplug the filter before cleaning, and keep towels ready for spills.
- Rinse sponges, ceramic rings, and bio-media in old aquarium water, never tap water.
- Clean intake strainers, tubing, impellers, and housing with brushes to remove debris and restore flow.
- Replace floss and activated carbon on schedule, usually every 4–6 weeks, and stagger media changes.
- Restart the filter carefully, prime if needed, and monitor water flow and parameters after cleaning.
How to Clean an Aquarium Filter
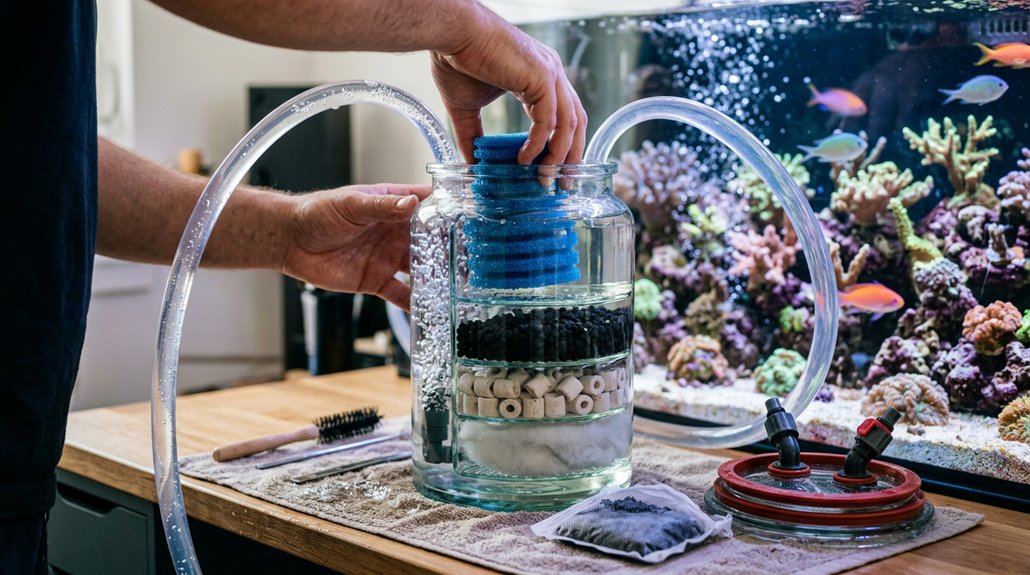
Before you start, turn off and unplug the filter—and any inline UV steriliser—then keep towels or a bucket nearby to catch spills. Remove media carefully. Rinse sponges, ceramic rings, and other bio-media in a bucket of aquarium water, not tap water, so you don’t disrupt filter chemistry or kill beneficial bacteria. Use tap water only on non-biological parts, such as the housing, strainer, tubing, and impeller. Scrub those components with small or flexible brushes to clear gunk, restore flow, and prevent airlocks. Replace disposable media like floss and carbon on schedule, following manufacturer guidance; carbon usually needs media disposal every 4–6 weeks. Stagger sponge or ceramic replacements so you don’t remove all biological media at once. Reassemble, prime if needed, and monitor water parameters after restart.
When to Clean an Aquarium Filter
You should clean or rinse pre-filter sponges and inlet cages weekly, or sooner if you notice reduced surface movement or slower plant sway, because buildup there can quickly restrict flow. Rinse biological media and sponges in aquarium water whenever flow drops noticeably or tests show rising ammonia or nitrite; don’t use tap water. For external canister filters, inspect monthly, and clean media trays only when flow weakens or mechanical media looks clogged. Replace filter floss and activated carbon every 4–6 weeks, or when discolored, and stagger sponge or ceramic replacement to protect bacteria. If priming fails, or tubing rattles, airlocks, or starts slowly, clean tubing and impellers before servicing the canister. This seasonal maintenance routine extends filter lifespan.
Daily and Weekly Filter Checks
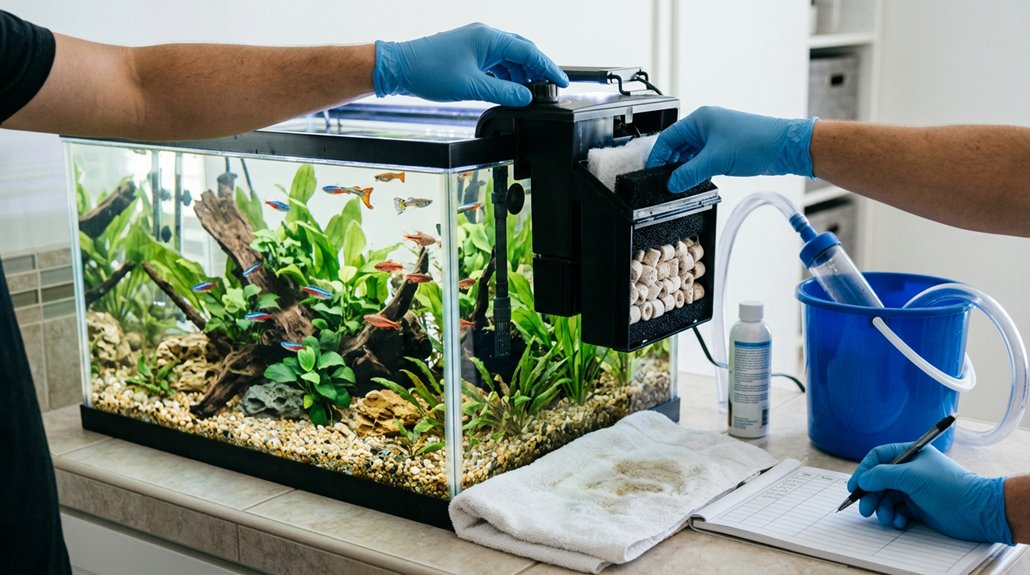
Each day, you should verify that surface ripple and plant movement are normal, since reduced flow or limp plants can indicate a filter problem. Check the intake area for algae, debris, or other blockages and clear them right away if you see them. Each week, compare flow rate and rinse the intake sponge or cage in old tank water to remove detritus without stripping beneficial bacteria.
Daily Flow Checks
Daily flow checks help catch filter problems early, before water quality starts to slip. During each visual inspection, watch the surface ripple and plant motion; if they’re weaker than normal, the filter’s output may be dropping. Use hand feel by passing your fingers gently in front of the outflow or intake; reduced pressure usually means blockage or impeller trouble.
- Compare today’s flow with yesterday’s.
- Note any sudden drop in current.
- Listen for rattling or trapped air.
- Check for dampness around the unit.
Do a weekly flow verification by timing a known-volume container at the outflow, then compare that rate with the filter’s rated output. If you notice drift, investigate promptly. Consistent monitoring helps you spot early failures, keep circulation stable, and avoid stress on your fish and plants.
Weekly Intake Cleaning
Weekly intake cleaning starts with a quick daily check of surface movement, plant motion, and outflow strength; if the current is noticeably weaker than yesterday, the intake may be partly blocked. Each day, inspect the intake strainer for debris, algae, or snails, and clear visible buildup before it restricts circulation or overheats the pump. During weekly maintenance, compare flow rate by feel or sight, then remove the pre-filter sponge or intake cage and rinse it in a bucket of old tank water, not tap water. Brush the strainer, siphon tube tip, and impeller inlet with tank water to remove slime. Check hoses, seals, and intake alignment for kinks, leaks, or dampness. This also helps with snail eggcare.
How to Clean Aquarium Sponge and Pre-Filter Sponges
To clean sponge filters, you should remove the sponge while keeping it submerged in a bucket or sealable bag filled with tank water, then squeeze it several times until the expelled water runs clear. For pre-filter sponges, inspect the cage, strainer, and base, then scrub them with a toothbrush or small brush while keeping the sponge damp and using water close to aquarium temperature. Don’t rinse with chlorinated tap water or hot water, and stagger sponge replacement so you don’t disrupt biological filtration.
Cleaning Sponge Filters
When a sponge filter or pre-filter sponge starts slowing down or the rinse water turns brown, it’s time for a gentle cleaning that preserves the beneficial nitrifying bacteria. For air driven maintenance and sponge aeration, keep the media damp and rinse only in tank water, never tap water.
- Lift the sponge underwater into a sealed bag or bucket of tank water.
- Squeeze it 3–4 times, then let the expelled debris drain into a bucket.
- Refill the bag with tank water and repeat until the water runs clearer.
- Rotate multiple sponges, cleaning one now and another later, so you don’t strip the whole colony at once.
If a sponge is misshapen or degraded, replace it. Save ceramic media by swishing it gently in tank water.
Pre-Filter Sponge Care
Pre-filter sponge care works much like cleaning a sponge filter: you want to remove trapped debris without wiping out the nitrifying bacteria living in the media. Check flow and surface movement; when they’re reduced, clean the sponge, usually every 1–4 weeks. Remove it, then scrub the intake cage, impeller housing, and sponge exterior with a soft brush in old tank water. Rinse the sponge in a bucket of tank water, squeezing it several times until the water runs clear. Don’t use tap water unless it’s dechlorinated and temperature-matched. If you run multiple sponges, stagger cleaning so one stays online for bacterial seeding. Sponge placement near the intake helps trap waste early, but it also means faster clogging, so inspect it often.
How to Clean HOB and Canister Filters
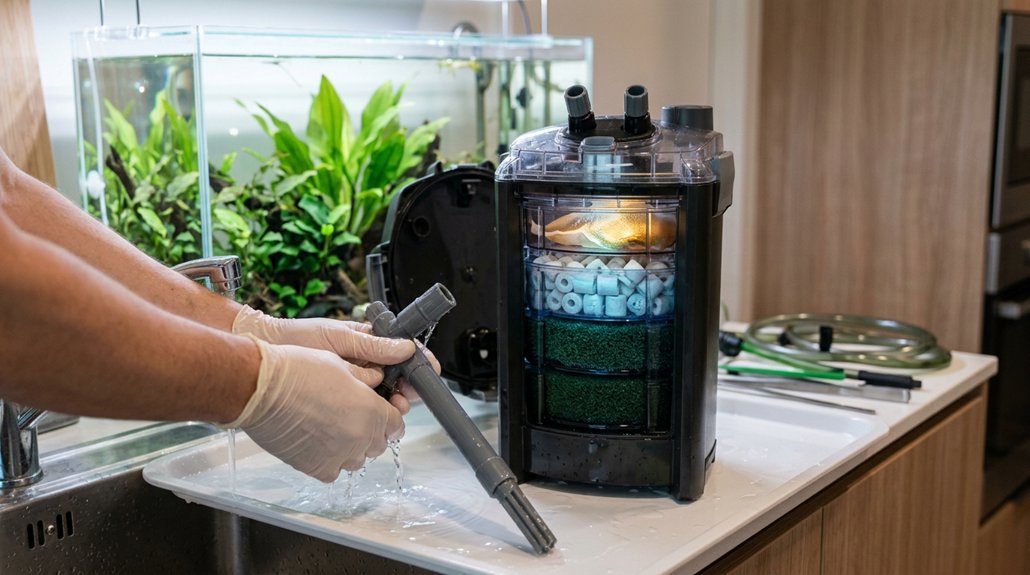
Start by unplugging the filter and switching off any inline UV, then pull the HOB or canister media trays into a bucket of tank water so the media stays wet and your beneficial bacteria aren’t exposed to air. Rinse sponges, bio-rings, and ceramic media in that water until it runs clearer; replace floss or carbon cartridges instead of washing them.
Unplug the filter, keep media wet in tank water, and rinse sponges and bio-media gently.
- Brush the impeller, housing, and intake tubing
- Clean prefilter sponges with a toothbrush
- Keep tray arrangement coarse→fine→chemical
- Do impeller maintenance before reassembly
For canisters, inspect O-rings and apply silicone grease if they’re dry. Reassemble, reconnect hoses tightly, and restart the unit with the priming button or siphon aid. Expect brief cloudiness, then verify normal flow and zero ammonia or nitrite.
Fix Aquarium Filter Flow and Priming Issues
If your aquarium filter’s flow has dropped, begin by checking the inlet pre-filter sponge, intake strainer, and tubing, since clogged prefilters and hoses are the most common causes of weak circulation; squeeze or swish the sponge in old tank water, then use a long brush to clear gunk from the tubing. If you’re running a canister, use the primer button or a siphon starter bulb to fill it, and keep the hose run short and downhill for better siphoning. For airlock removal, shut the unit off, open it, and purge trapped air. Perform impeller maintenance by removing the impeller and housing, cleaning debris, and lubricating seals or O-rings before reassembly. If flow stays weak, replace deteriorated media gradually, and inspect inline devices or bent tubing. After restart, watch surface agitation and test ammonia and nitrite if downtime was long.
Frequently Asked Questions
How to Maintain a Filter for a Fish Tank?
Check your filter daily for reduced flow rate, then rinse sponges and bio media in old tank water every 1–4 weeks. Unplug first, keep media damp, and inspect hoses, impeller, and seals regularly.
Are You Supposed to Leave the Fish Tank Filter on All the Time?
Yes, you should leave your fish tank filter on all the time; continuous filter runtime keeps biological filtration stable and circulation steady. Don’t do frequent power cycling, since it stresses bacteria, shortens equipment life, and risks ammonia spikes.
Can I Just Rinse My Fish Tank Filter?
Yes, you can rinse your filter, but use old tank water for media. Don’t use tap water, since it can disrupt bacteria and water chemistry. Clean impellers and tubing, and replace disposable media when dirty.
How Long Should an Aquarium Filter Last?
A decent aquarium filter can last ages—years to over a decade. Your filter lifespan depends on build quality and upkeep. Follow the manufacturer’s replacement schedule, and you’ll usually replace impellers, seals, or media, not the whole unit.
Conclusion
Keeping your aquarium filter properly maintained protects your fish and stabilizes water quality. Check flow daily, inspect media weekly, and clean sponges only in tank water to preserve beneficial bacteria. One study found that nearly 90% of aquarium problems trace back to poor filtration or maintenance, so small, consistent upkeep prevents big losses. If you stay on schedule, you’ll keep your filter running efficiently, reduce waste buildup, and support a healthier, more reliable aquarium.